The Content Planning System I Set Up for a Lifestyle Creator (Behind the Scenes)
When my client came to me, she was a lifestyle creator with great content ideas, a loyal audience, but had no content planning system for getting any of it out the door. She was filming Reels she forgot about, missing brand deal deadlines, and spending more mental energy figuring out what to post than actually creating. Sound familiar? This is what I see with almost every influencer I work with, not a creativity problem, but a planning problem. So I built her a content planning system from scratch, and in this post I’m walking you through exactly what that looked like.
1 – Content Ideas and Planning
You know that moment, you’re scrolling Instagram or running an errand, and a great content idea pops into your head. This is where you capture it before it disappears. In the template, you can log your idea either through the “Forms” tab or directly in the “Data” tab. The Forms tab is especially great if you have a team, since anyone can submit ideas in one place. The goal is simple: every content idea lives here, so nothing gets lost.
Personal tip: I actually like writing ideas down on paper first. When I go straight to my phone, I either get distracted by other apps or lose the idea entirely, so pen and paper is my first step before logging it here. Or you can add the worksheet in GoodNotes on your iPad and write your content idea there if you prefer. Grab it here.
(There’s also a free Airtable app you can download on your phone to access this template on the go.)

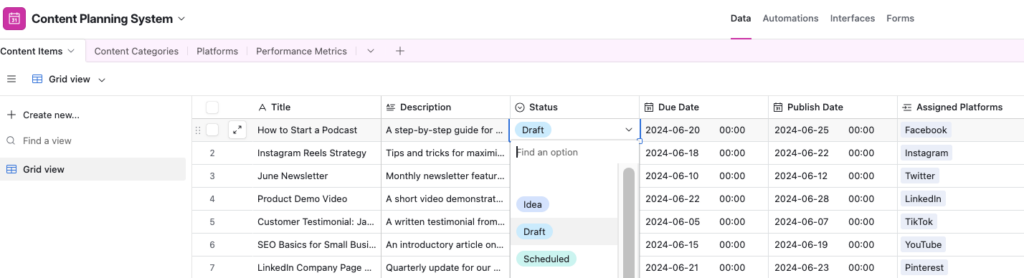
2 – Plan & Develop Content
Yay! You are ready to plan and develop your content ideas. Update the status to “Draft.” Make sure to add a due date, assign it to someone on your team, and tag the right platforms. In the “Notes” section, you can write your script.
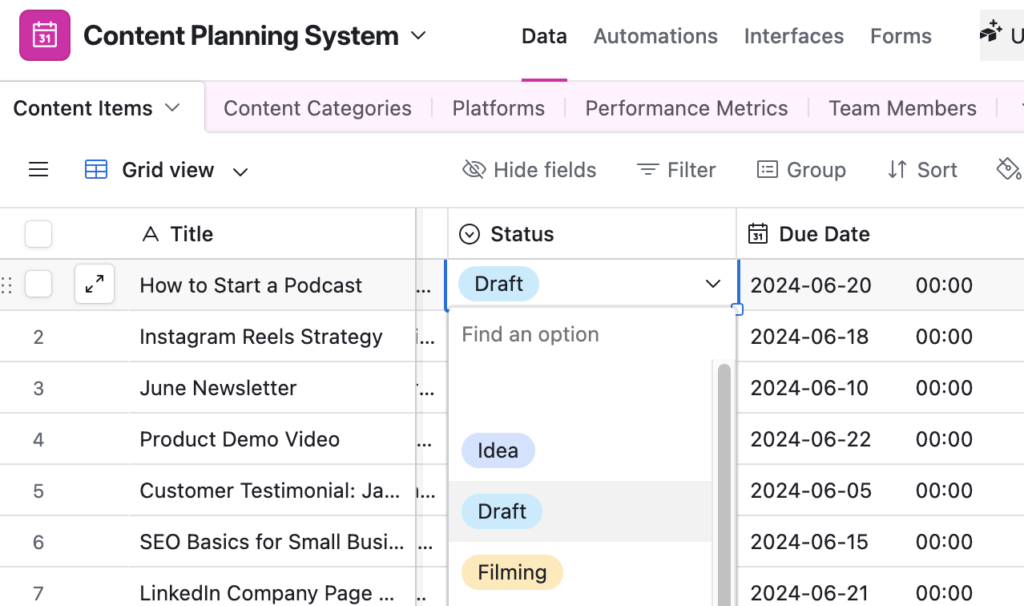
3 – Filming
Continue using the “Filming” status during production. Update Notes with filming schedules, shot lists, or editing progress. Then attach raw footage or edited versions to Visual References for review.
4 – Editing
So you’ve filmed, and now it’s time to edit. Make sure to assign it to the right person and add a due date. Also, if you click “Interface” tab you can share the link to certain team members who need to see what content is in process.

5 – Schedule & Publish
Okay, so you’ve edited your content, and now it’s time to schedule it. Once approved, update the Status to “Scheduled” and set the Publish Date. Confirm the “Assigned Platforms” are correct. Check the Platforms table for Optimal Posting Times and Posting Requirements to ensure your content meets each platform’s specifications. When the content goes live, change Status to “Published”.
6 – Track Performance
After publishing, log results in the Performance Metrics table:
- Link to the Content Item and Platform
- Record Views, Likes, Comments, Shares, and Engagement Rate
- Mark standout content as a Top Performer for future reference
- Use Notes to capture insights (e.g., “Morning posts perform better”)
Here’s the Breakdown
If you’re done with the Sunday Scaries, scrambling for Reel ideas at 9pm, and batch-shooting content you immediately forget about, it’s time to stop winging it and get a real system in place. WORK WITH ME
